GE Aerospace’s global network of service shops soon will have a new inspection process to improve the way they inspect metal parts, using the same technology scientists rely upon to help museums and auction houses identify forged artwork. It will be the first deployed through GE Aerospace’s new STAC facility, which opens in September.
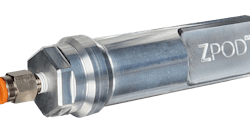
GE Aerospace, in partnership with Bruker, a leading provider of analytical tools for material characterization, have developed a new inspection process using a non-destructive open beam x-ray fluorescence spectroscopy (XRF) inspection device capable of detecting microstructural variations in metal parts.
Along with improving the quality and detail of part inspections, this new inspection process is designed to improve our airline customer’s cost of ownership by more clearly delineating airworthy repaired parts that can be returned to the field in lieu of replacing them entirely with new parts. This will help reduce supply chain constraints with the manufacture of new parts, improving the overall turnaround time of our engine overhauls.
“We’re excited to be opening our new STAC facility, which will serve as a major accelerator for scaling and deploying cutting edge inspection and repair processes to market,” said Nicole Jenkins, Chief MRO Engineer, GE Aerospace. “We have already begun moving equipment into the facility and preparing to launch our first inspection process that takes a page from the art world to improve the quality and speed of detecting chemical anomalies in metal parts.”
Thomas Schuelein, president of Bruker’s Nano Analytics Division, commented: “We are excited to extend our most advanced XRF technology into the aerospace industry, contributing to set a new standard in non-destructive chemical analysis techniques and therefore helping to support aircraft component re-manufacturing quality. This first successful program under the joint technology development agreement with GE Aerospace underlines Bruker’s commitment to innovation, and we look forward to further breakthroughs in this sector.”
The 'Chemical' Bond of Jet Engine Metal Parts and Art
Investigating works of art and inspecting metal parts in jet engines have something in common – both have a chemical composition. In art and conservation, XRF is used to image and see aspects of an art object’s chemical composition that can tell you about the history of its origin and how to restore it or, in some cases, whether the piece is real or fake. For metal part inspections, the XRF provides a view of the part’s chemical composition that can help a service engineer more-readily spot anomalies.
“With the new XRF technology we have developed in partnership with Bruker, we’re inspecting metal jet engine parts at the same level of forensic detail museums and auction houses use to identify forged pieces of artwork,” Jenkins added. “This new inspection will allow us to be even more vigilant with verifying the integrity of metal parts.”
The new process using X-ray is one of a variety of imaging methods and techniques GE Aerospace engineers use in its inspection processes. Ultrasound, Computed tomography, flash thermography, eddy current testing, fluorescent penetrant inspection, and dimensional metrology are also used to inspect engine components, depending on what can best interrogate a given material or part.


